By: AY1920S1-CS2103T-W12-3 Since: SEPT 2019 Licence: MIT
1. Introduction
PalPay is for those who prefer to use a desktop app for managing personal finances. More importantly, PalPay is optimized for those who prefer to work with a Command Line Interface (CLI) while still having the benefits of a Graphical User Interface (GUI). If you can type fast, PalPay can get your finance management tasks done faster than traditional GUI apps. This User Guide is written for the users of PalPay as an introductory document of the application. You are strongly encouraged to read this document before using the application to enjoy the full functionality of the application. Ready to start your journey to financial freedom? Jump to Section 2, “Quick Start” to get started. Enjoy!
2. Quick Start
-
Ensure you have Java
11or above installed in your Computer. -
Download the latest
PalPay.jarhere. -
Copy the file to the folder you want to use as the home folder for your finance manager.
-
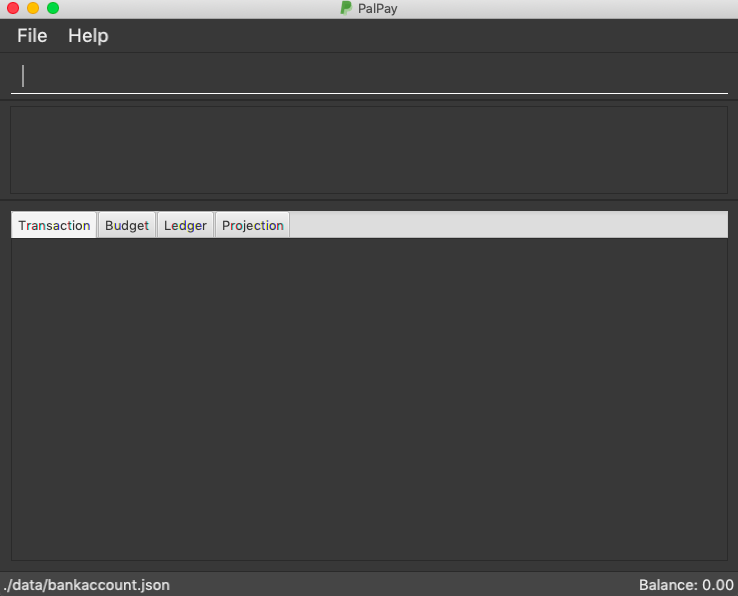
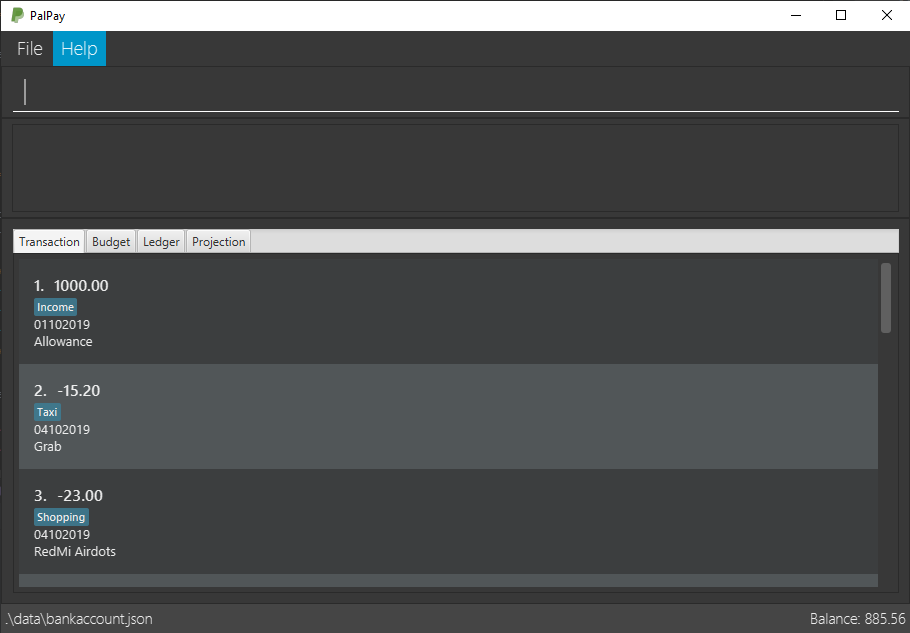
Double-click the file to start the app. The GUI should appear within a few seconds. Starting up, there should be no prior data pre-stored in the application. The GUI should look like this:
-
Your overall balance is reflected at the right bottom of PalPay window.
-
Type your command in the command box and press Enter to execute it.
Example: Typinghelpand pressing Enter will open the help window. -
Some example commands you can try:
-
view transaction: shows list of your transactions. -
in $/100 n/mother d/31102019 c/allowance: adds an income to your personal finance of 100 dollars with the category mother and the description allowance. -
out $/3 n/pie d/19112019 c/food: adds an expenditure to your personal finance of 3 dollars with the category food and the description pie. -
exit: exits the app
-
-
Refer to Section 3, “Features” for details of each command.
3. Features
Command Format
-
Words in
UPPER_CASEare the parameters to be supplied by the user.
Example: Forin $/AMOUNT n/ITEM d/DATE,AMOUNT,ITEMandDATEare parameters which can be used asin $/300 n/concert d/19112019. -
Items in square brackets are optional.
Example:n/ITEM [c/CATEGORY]can be used asn/coke c/drinksor asn/coke. -
Items with
… after them can be used multiple times including zero times.
Example:[n/NAME]…can be used asn/Amy,n/Amy n/Bettyetc. -
Parameters can be in any order.
Example: If the command specifies$/AMOUNT n/ITEM,n/ITEM $/AMOUNTis also acceptable. -
Parameters that need to be concatenated together are represented as
PARAM+PARAM.
Example:TYPE+INDEXrefers to joiningTYPEandINDEXtogether without a space, such ast1.
3.1. Logging Income : in
Adds an income of your personal finance
Format: in $/AMOUNT n/ITEM d/DATE [c/CATEGORY]
Examples:
-
in $/100 d/01012019 n/errand c/work c/drinks -
in $/200 d/29022020 n/mom c/family -
in $/120 d/31122019 n/work
3.2. Logging Expense : out
Adds an expenditure of your personal finance
Format: out $/AMOUNT n/ITEM d/DATE [c/CATEGORY]
Examples:
-
out $/100 d/01012019 n/milk c/food c/drinks -
out $/29 d/29022020 n/taxi c/transport -
out $/12 d/31122019 n/burger
3.3. Setting a Budget : set
You can set a budget for a particular category until a certain date, given it is not already present in the budget list.
A duplicate budget is a budget with the same AMOUNT and DATE and CATEGORY.
If you attempt to do so, you will receive an error message: This budget already exists in the bank account.
Format: set $/AMOUNT d/DATE c/CATEGORY
Let’s say you want to restrict your spending for a certain category until a certain deadline.
PalPay allows you to set a budget and serve as a reminder to show how much of the budget set you have left
until the deadline. You will be more self-conscious of your spending and minimise your spending by setting a budget.
To set a new budget:
1. Type set and enter the relevant details (amount, deadline, category) in the format given above.
2. The result box will display the message "New budget successfully set".
3. If the budget already exists in the budget list, the result box will display the message "This budget already exists".
4. Now you can see the newly set budget in the budget list.
As you make an OutTransaction of a particular CATEGORY, your budgets with the same CATEGORY will be adjusted
to display the remaining amount of budget. Other budgets in the list belonging to different CATEGORY will not be adjusted.
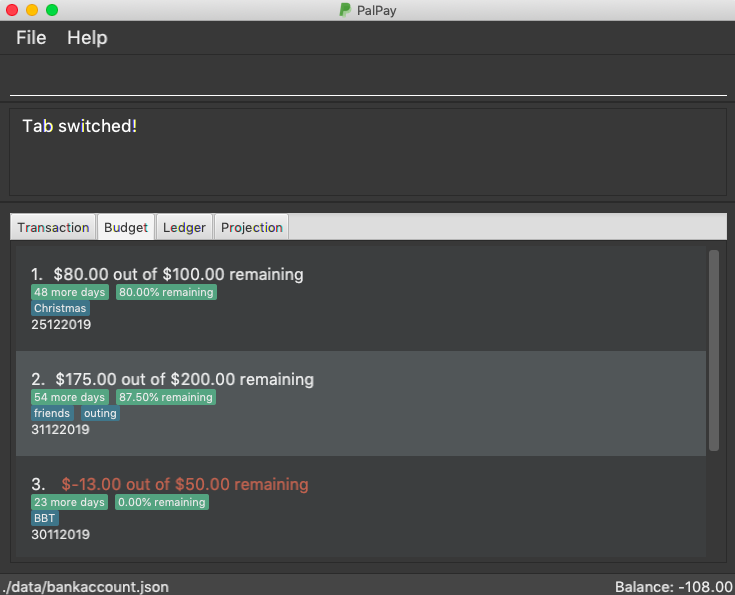
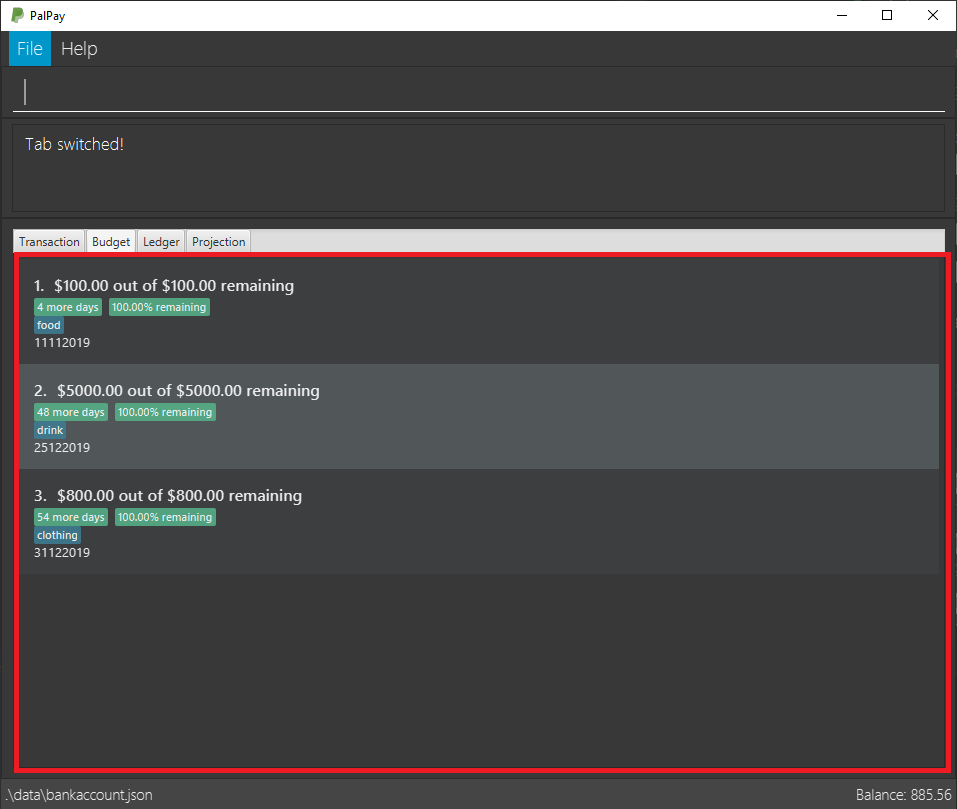
If you overspend beyond a set budget, the overspent budget will be displayed in red. Shown below as budget index 3 is an example of an overspent budget:
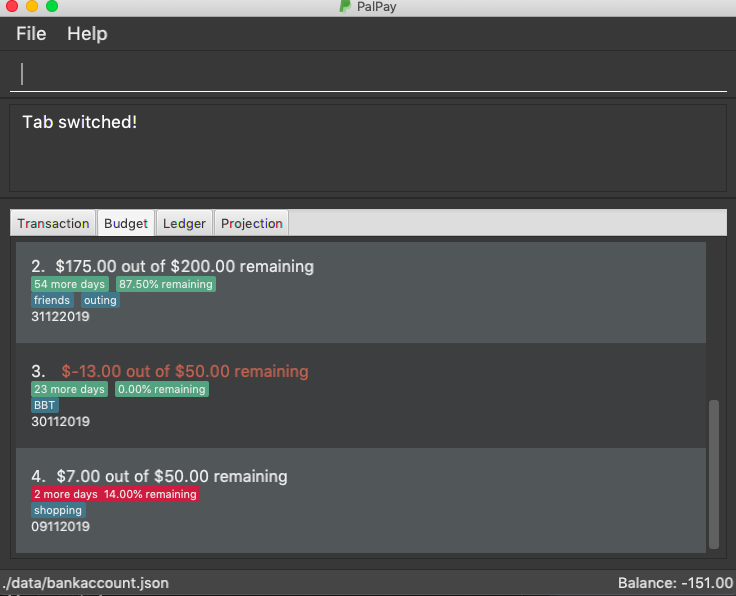
As the day you have set for the budget approaches, the countdown placeholder as well as the percentage remaining placeholder will turn to red when the number of remaining days reaches 3 and below. Shown below as budget index 4 is an example of a budget approaching its deadline:
Examples:
-
set $/100 d/010120120 c/BBT -
set $/300 d/29022020 c/shopping
3.4. Splitting a Bill with Friends : split
Split a bill with your friends
Format: split $/AMOUNT n/NAME1 [n/NAME2]… [s/SHARE]…
-
[SHARE]defines portion of bill to be paid by each person-
if no shares are given,
amountwill be split evenly across all people, including user -
user is included in the bill if number of shares is 1 more than number of people
-
user’s share will be the first listed share
-
-
each person’s share is assigned in order
-
i.e. last person’s share is the last share listed
-
-
shares cannot be negative numbers
-
Examples:
-
split $/1000 n/Amy n/Betty n/Catherine n/Dan-
$1000 is split equally between Amy, Betty, Catherine, Dan and the user.
-
-
split $/100 n/Albert n/Bernard n/Clement s/2 s/1 s/7-
$100 is split with Albert owing $20, Bernard owing $10 and Clement owing $70.
-
3.5. Receiving Money from a Friend : receive
Receives money from 1 friend
Format: receive $/AMOUNT n/NAME1 [d/DATE]
Examples:
-
receive $/2.5 n/Albert
3.6. Projecting Balance : project
Projects future balance based on past In or Out transactions
Format: project d/DATE
Examples:
-
project d/22072020 -
project d/01012020
=== Displaying View : view
Want to switch tabs without using your mouse? You can switch to another tab with the view command.
==== Command Syntax
Format: view TAB
==== Example Usage:
You do not have to use your mouse in PalPay to switch tabs anymore.
-
By default, you are in the
transactiontab.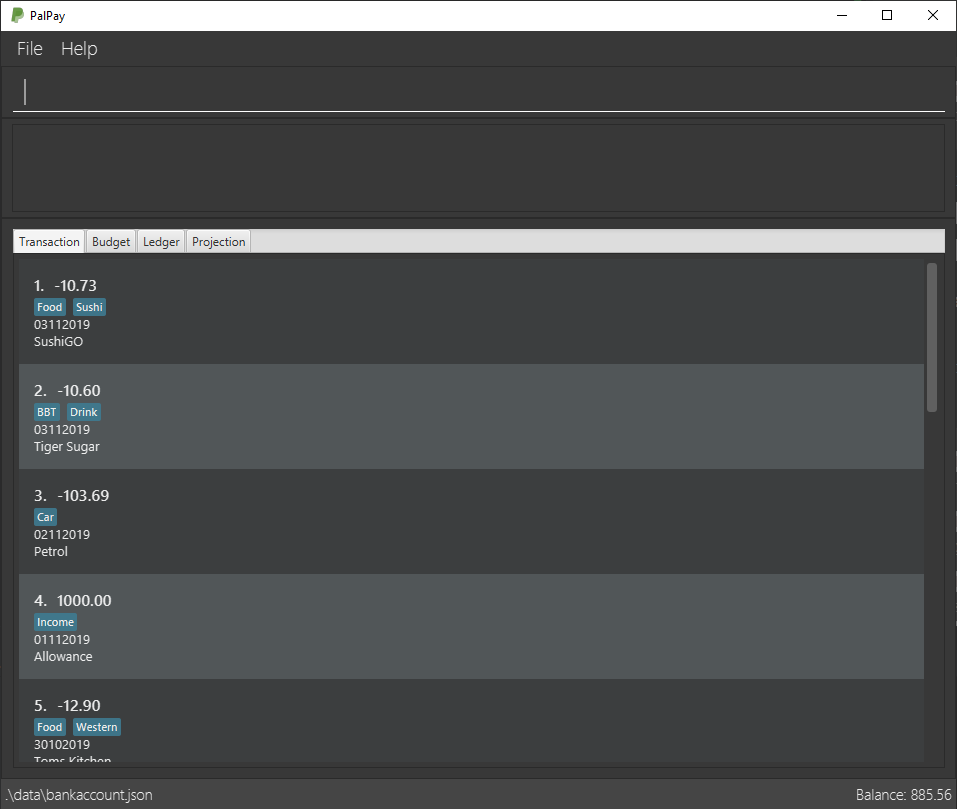
-
Simply type view budget in the command box and press Enter.

-
You can now view your budgets. Easy!
=== Deleting Finance : delete
Deletes the specified Transaction or Budget from the finance manager.
Format: delete TYPE+INDEX
Examples:
-
delete t1 -
delete b3
=== Updating Finance : update
Updates the specified income or expenditure from the finance manager.
Format: update TYPE+INDEX [$/AMOUNT] [d/DATE] [n/ITEM] [c/CATEGORY]
Examples:
-
update t1 $/20 n/coke c/drinks d/12122019 -
update b2 $/300 -
update t4 $/30 d/12102019
=== Sorting Transactions : sort
Have you ever wonder which is the most expensive transaction you ever made?
Or wondered which is the latest transaction you made? Fret not!
You can now sort your transactions according to date or amount.
==== Command Syntax
Format: sort PREDICATE/ORDER
==== Example Usage:
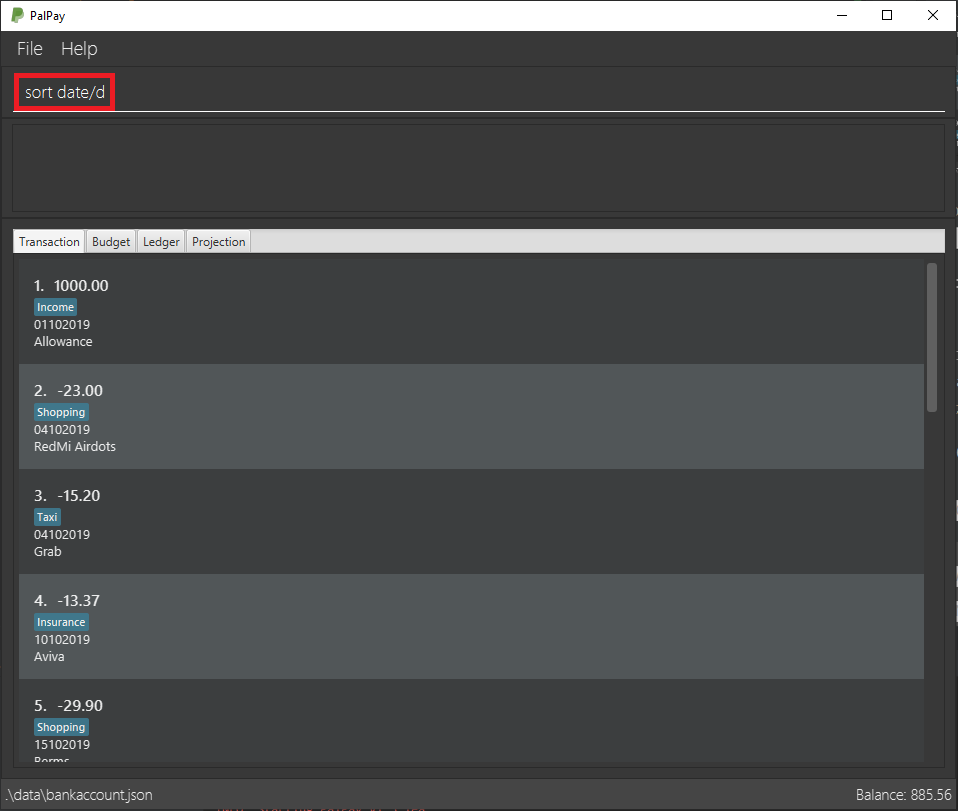
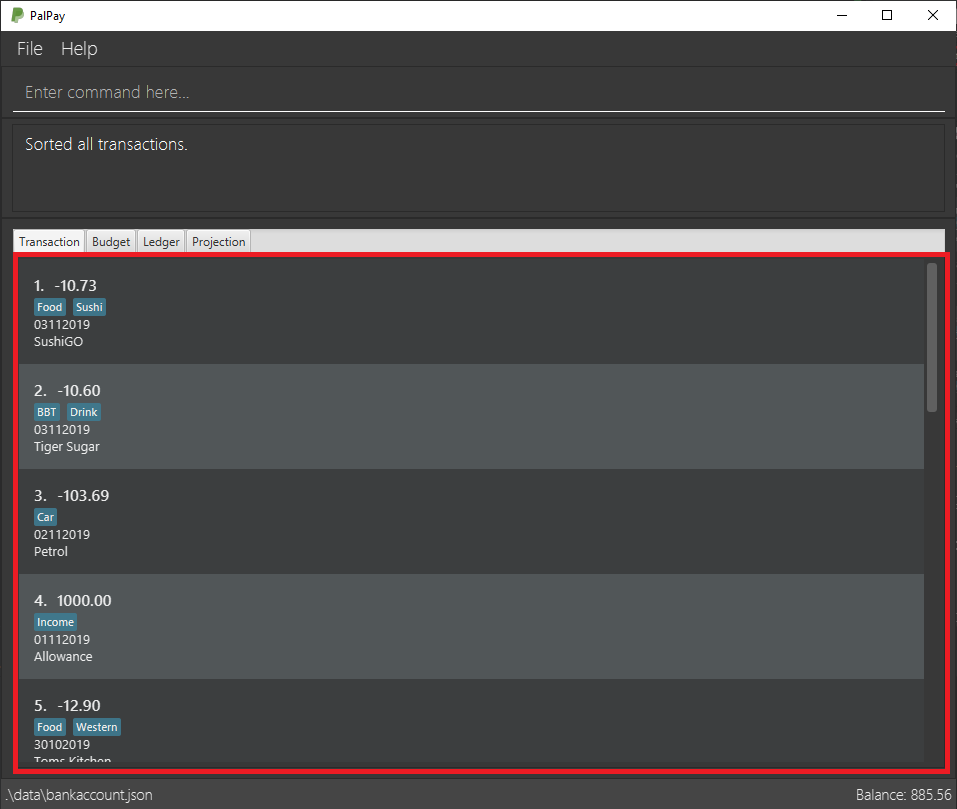
Do you want to know what is the latest transaction you made? No need to scroll all the way down anymore. PalPay has made it simple for you.
-
By default, your transactions are sorted from the earliest transaction you entered to the latest transaction you entered.

-
Simply type sort date/d in the command box and press Enter.
-
Great! You can now see the latest transactions you made.
=== Filtering Transactions : filter
Here at PalPay, you do not need to scroll through your history of transactions to find out what you spend two months ago.
PalPay gives you the power to filter your transactions to solve that problem.
==== Command Syntax
Format: filter [n/DESCRIPTION] [y/YEAR] [m/MONTH] [c/CATEGORY]…
==== Example Usage:
Imagine that you wanted to find out what you spent on shopping in October 2019.
-
By default, PalPay shows your all your transactions you have made.
-
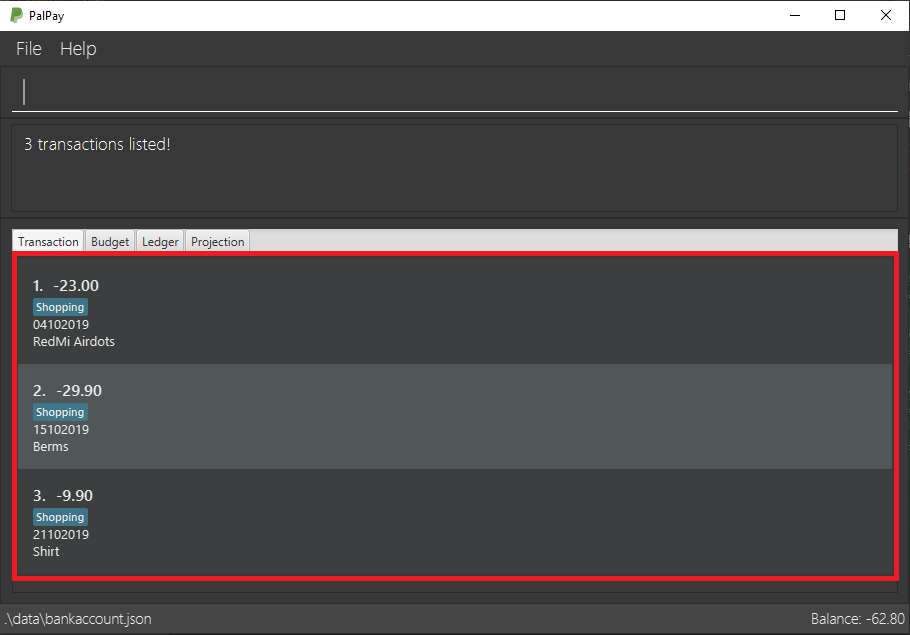
Simply type filter c/Shopping m/10 y/2019 in the command box and press Enter.
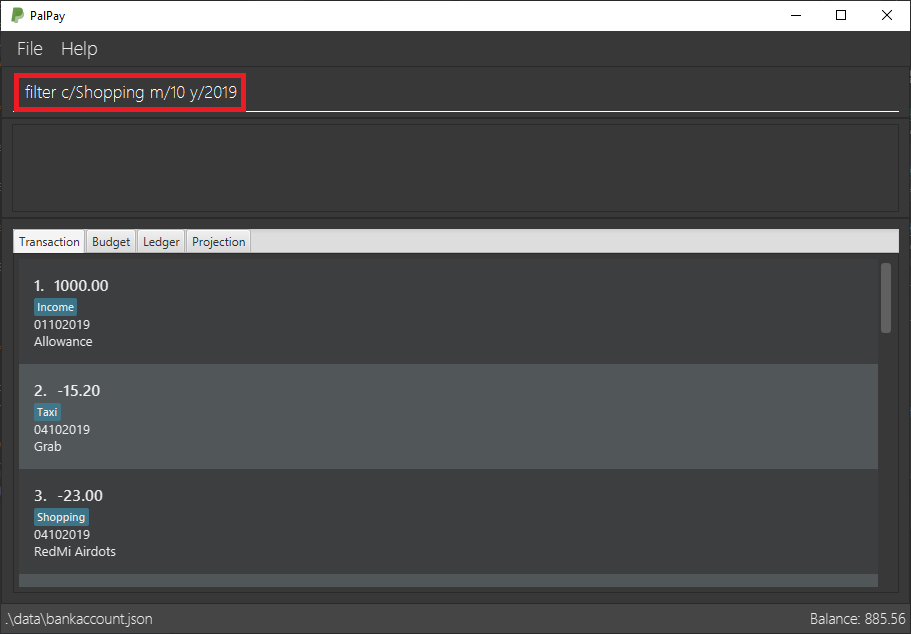
-
You will now see the list of transactions you have made while shopping in October 2019. Hurray!
=== Undoing the Last Command : undo
Did you accidentally delete a transaction? Do not panic! PalPay lets you undo your previous commands with just one
word, undo.
==== Command Syntax
Format: undo
==== Example Usage:
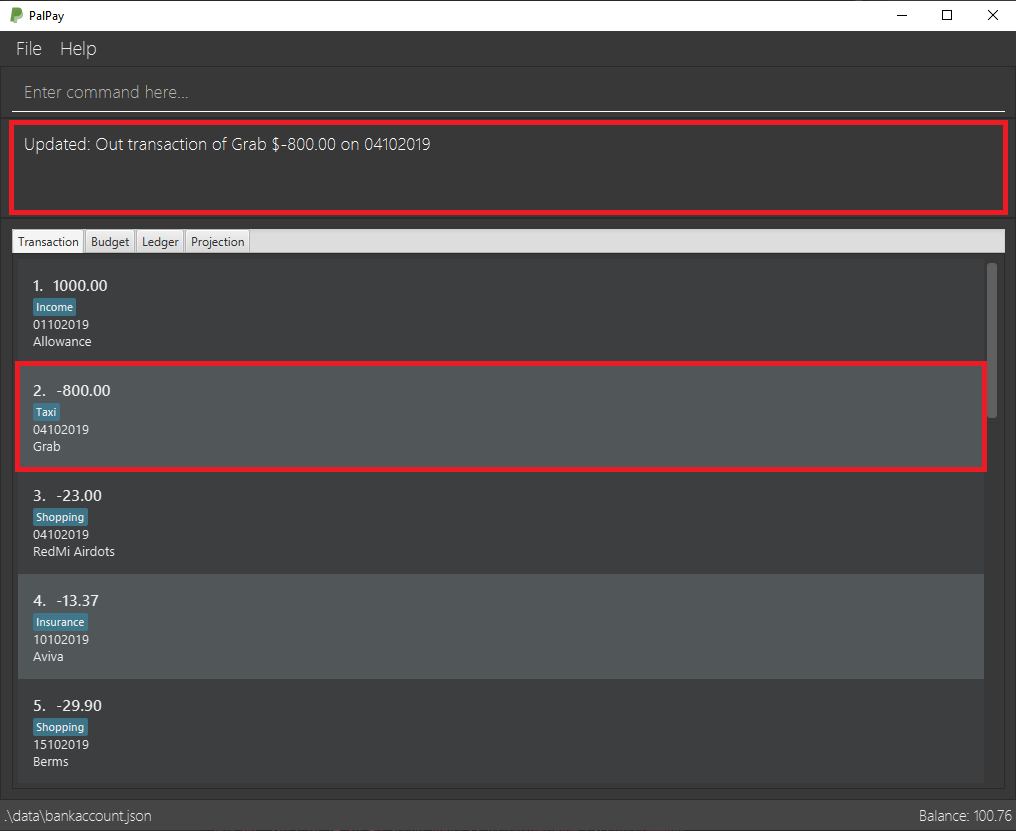
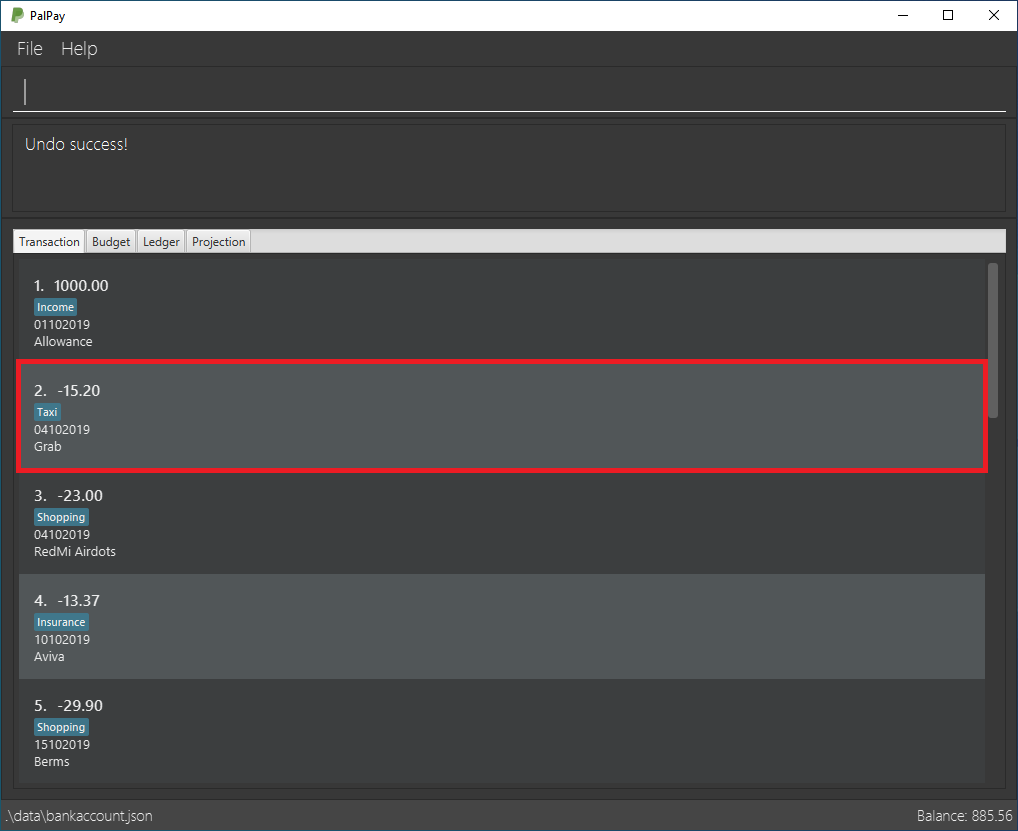
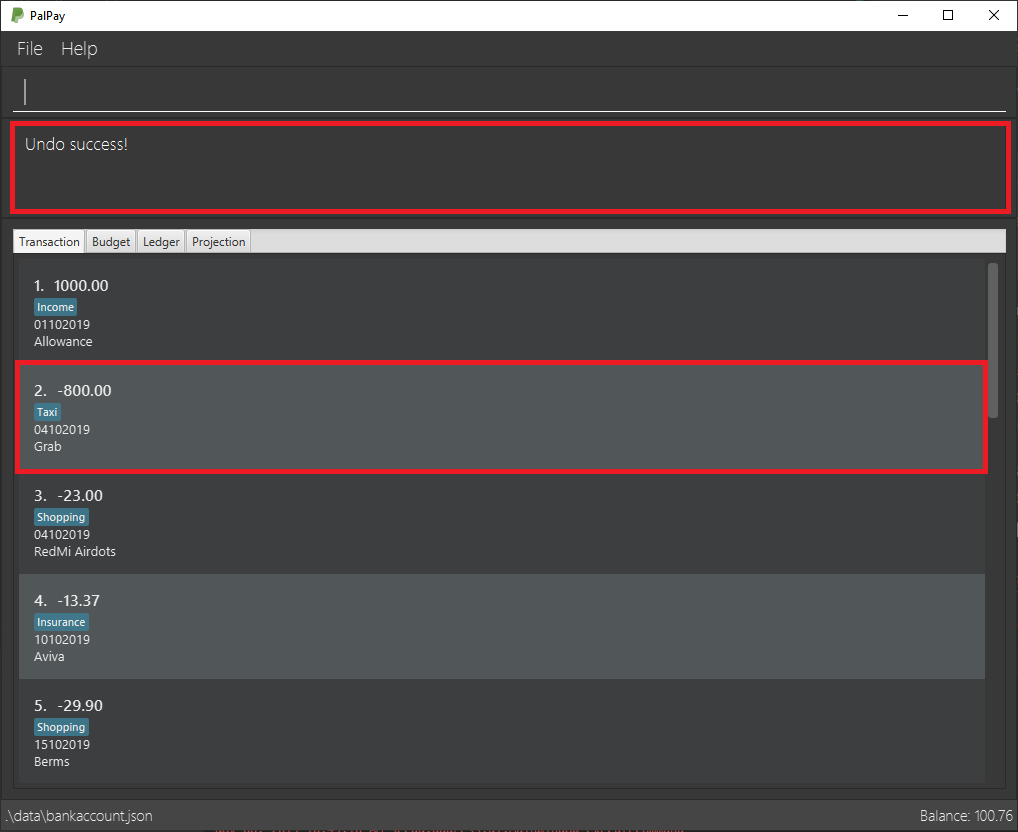
Suppose you want to update your allowance you received in October 2019 to $800 but you accidentally update the GrabTaxi
ride instead. Without going through the trouble of updating the same transaction again, you can simply perform the
undo command. Just follow these three simple steps.
-
Here, you can see the wrong update you just made.
-
Simply type undo in the command box and press Enter.
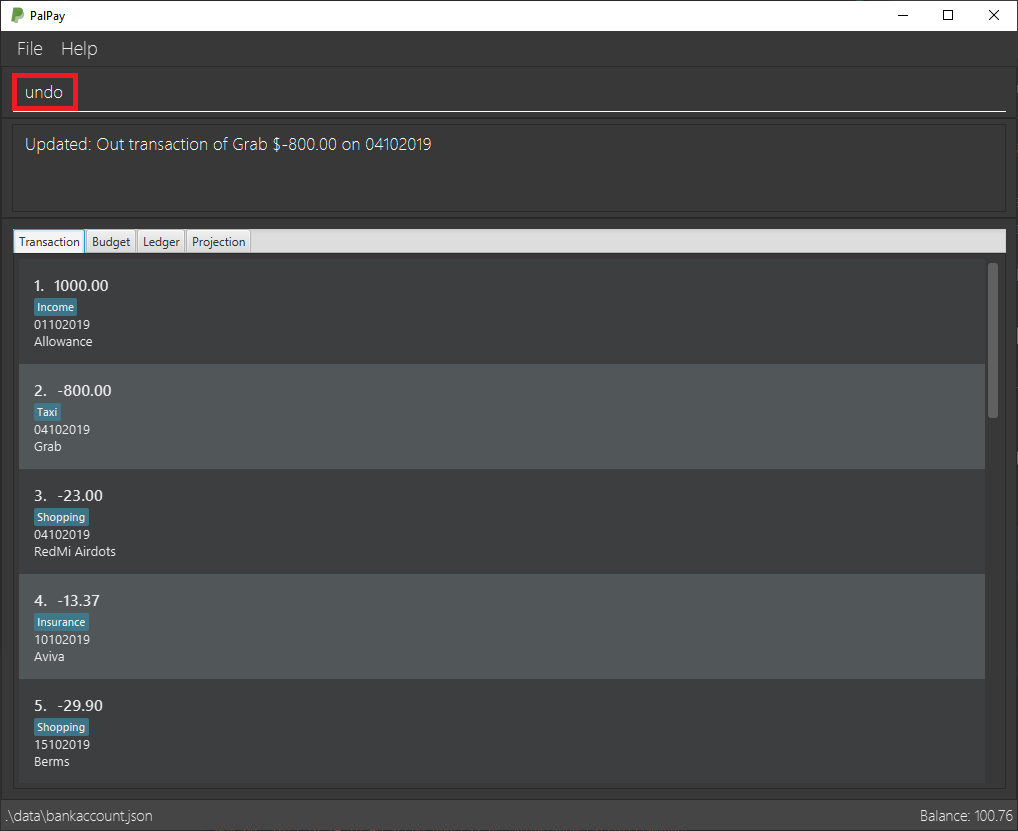
-
As you wish, your command has been undone.
=== Redoing the Last Command : redo
Made an extra undo by mistake? Do not worry! PalPay lets you redo your previous undo(s) with just one word, redo.
==== Command Syntax
Format: redo
==== Example Usage:
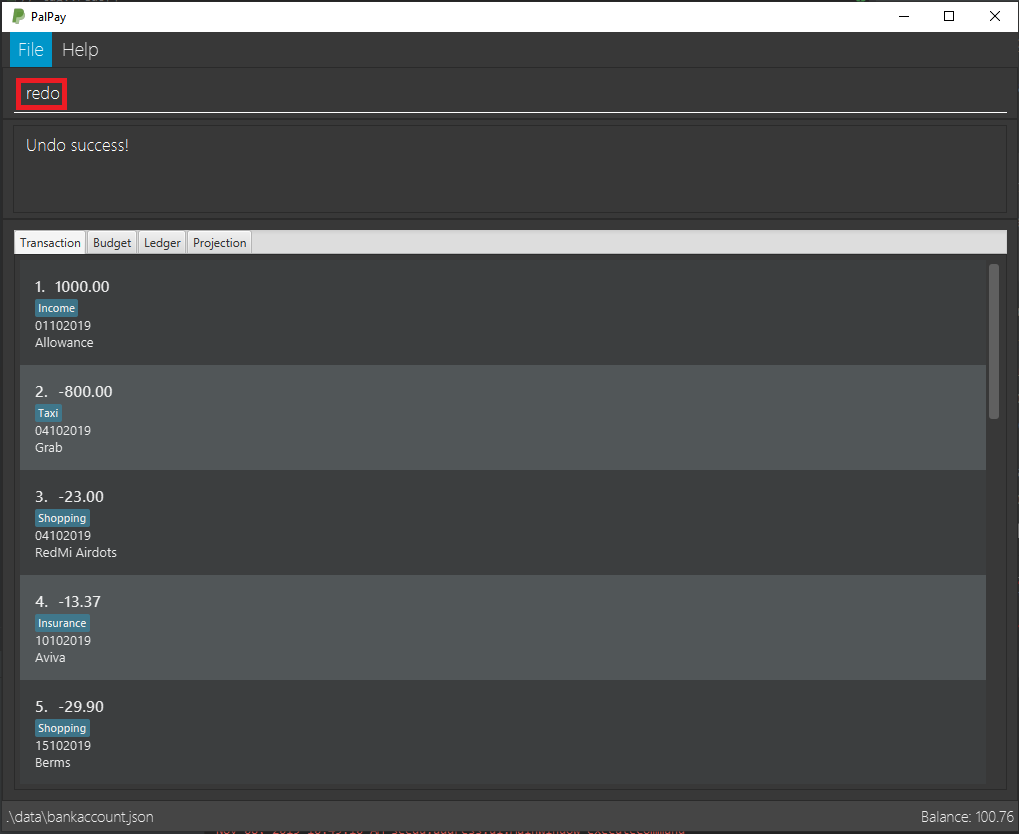
Suppose you want to undo your last update but you accidentally undo twice instead.
You can simply perform the redo command to revert the changes. Just follow these three simple steps.
-
Here, you can see the extra undo you just made and the GrabTaxi ride is back at $800.
-
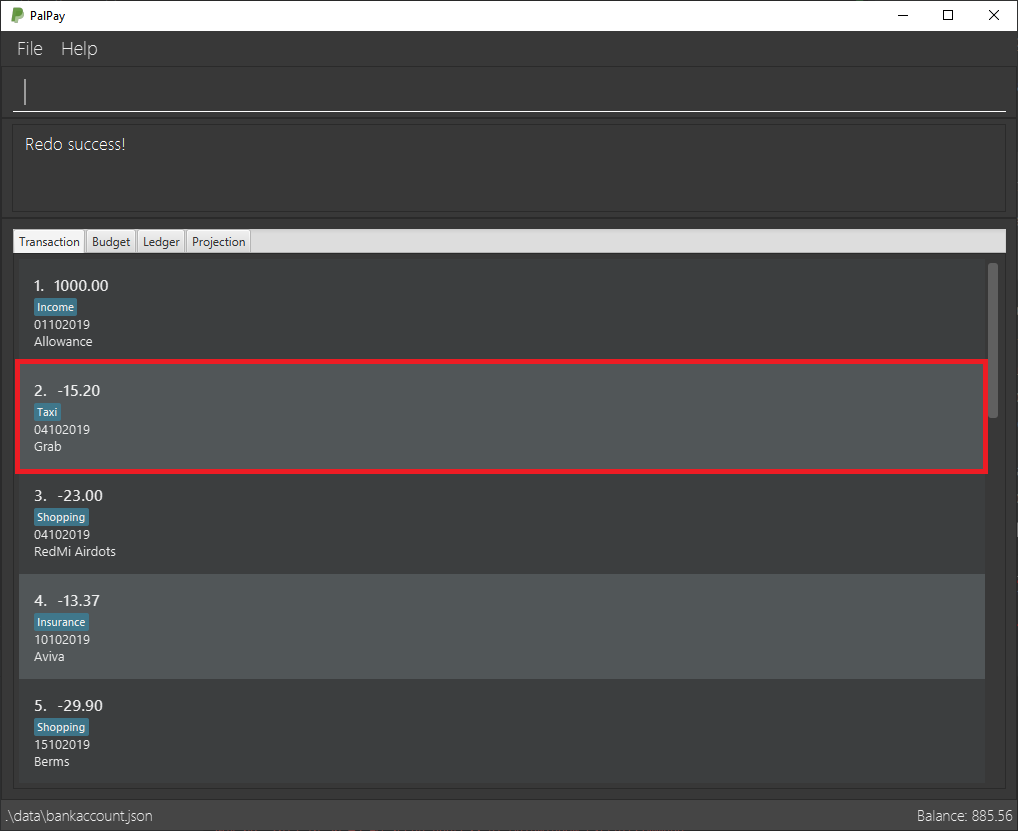
Simply type redo in the command box and press Enter.
-
Great! Your transaction is back to normal.
=== Clearing All Entries : clear
Clears all entries from your Bank Account.
Format: clear
=== Listing All Entries : list
Lists all entries from your Bank Account.
Format: list
=== Viewing Help : help
Opens help page for the list of usable commands
Format: help
=== Exiting the Application : exit
Exits the program.
Format: exit
=== Saving the Data
PalPay data is saved in the hard disk automatically after any command that changes the data.
There is no need to save manually.
== FAQ
Q: How do I transfer my data to another Computer?
A: Install the app in the other computer and overwrite the empty data file it creates with the file that contains the data of your previous Bank Account folder.
== Command Summary
-
Split
split $/AMOUNT n/NAME1 [n/NAME2]… [s/SHARE]…
Example:split $/100 n/Albert n/Bernard n/Clement s/2 s/1 s/7 -
Out :
out $/AMOUNT n/ITEM d/DATE [c/CATEGORY]
Example:out $/20 n/coke d/19112019 c/drink c/lunch -
In
in $/AMOUNT n/ITEM d/DATE [c/CATEGORY]
Example:in $/100 n/allowance d/11112019 c/income -
Set :
set $/AMOUNT d/DATE c/CATEGORY
Example:set $/100 d/10102019 c/food -
View :
view TAB
Example:view transaction -
Delete :
delete TYPE+INDEX
Example:delete t1 -
Update :
update TYPE+INDEX [$/AMOUNT] [d/date] [n/ITEM] [c/CATEGORY]
Example:update b1 $/100 c/transport -
Sort :
sort PREDICATE
Example:sort amount -
Filter :
filter [n/DESCRIPTION] [y/YEAR] [m/MONTH] [c/CATEGORY]…
Example:filter c/transport c/allowance y/2019 -
Project :
project DURATION
Example:project d/22072020 -
Redo :
redo -
Undo :
undo -
Clear :
clear -
List :
list -
Help :
help -
Exit :
exit